

How To Add Shadow Text Effect In Word

Using Text To Shadow Itself In Photoshop
In this Photoshop text effects tutorial, we're going to see how like shooting fish in a barrel it is to add together some visual involvement to text in Photoshop by using a copy of the exact same text to shadow itself.

Let'due south become started!
Step ane: Create A New Bare Document
Beginning, permit's create a new bare Photoshop document. Go up to the File menu at the height of the screen and cull New, or simply utilise the keyboard shortcut Ctrl+N (Win) / Command+North (Mac). Either method will bring up Photoshop's New Certificate dialog box. Enter in whatsoever size you need for your document. I'yard going to enter a Width of half dozen inches, a Height of iv inches, and a Resolution of 300 pixels/inch, just again, you lot can enter any size you need. I'one thousand too going to set my Groundwork Contents to White so that white appears as my background colour in the certificate. Click OK when you're washed to go out out of the dialog box. Your new bare certificate volition appear on your screen.
Create a new bare Photoshop document.
Step ii: Select The Blazon Tool
Side by side, select the Type Likewisel from the Tools palette, or press the letter T to select with the keyboard shortcut:
Select the Type Tool.
Step 3: Select A Font, Size And Color For Your Text
With the Type Tool selected, become up to the Options Bar at the top of the screen and choose whichever font you'd similar to use. I'll use Tahoma Assuming at a size of sixty pt. You, of course, can utilize whichever font you prefer, and the size you lot choose may be dissimilar depending on the font you lot choose, also equally on the size of the document you're working with:
Select a font and font size in the Options Bar.
Then, to select a color for the text, click on the color swatch in the Options Bar.
Click on the color swatch in the Options Bar to modify the text color.
This will bring up Photoshop's Color Picker. Select a nice, bright color for your text. I'll cull a bright red color. Once yous've chosen your color, click OK in the meridian right corner of the dialog box to exit out of it:
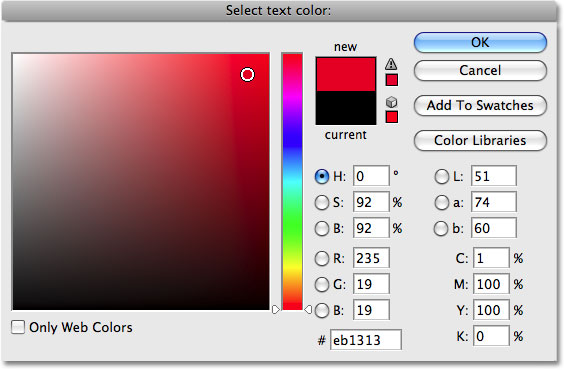
Choose a colour for the text from the Color Picker, then click OK to exit out of it.
Footstep 4: Add Your Text
With the font and text colour called, click inside the certificate and add your text. I'll type the word "SHADOW". When you're done, click on the checkmark in the Options Bar to accept the text and edit out of text editing mode:

Add your text to the certificate, then click the checkmark in the Options Bar to accept it.
In one case you've added your text, your Layers palette volition show the text on its own layer directly above the Groundwork layer.
The text appears on its own layer above the Groundwork layer.
Stride five: Duplicate The Text Layer
We're going to apply the exact same text to shadow itself, and to do that, nosotros'll demand a copy of the text, which ways we need to duplicate our text layer. Brand certain you have the text layer selected in the Layers palette (selected layers are highlighted in bluish), then press Ctrl+J (Win) / Command+J (Mac) to indistinguishable the layer. A re-create of the text layer will appear above the original:
The Layers palette showing a copy of the text layer above the original.
Step 6: Select The Original Text Layer
Since our original text layer is below the copy, we'll use the original text layer for our shadow effect. Click on the original text layer in the Layers palette to select information technology:

Click on the original text layer in the Layers palette.
Step 7: Choose A Darker Version Of The Text Color To Utilize As The Shadow
With the original text layer selected in the Layers palette and the Type Tool still selected, click once more on the color swatch in the Options Bar at the top of screen and select a unlike color from the Colour Picker. We're going to utilise this color as a shadow consequence for the text, and so choose a darker version of your original color. Hither, I'm choosing a darker carmine:
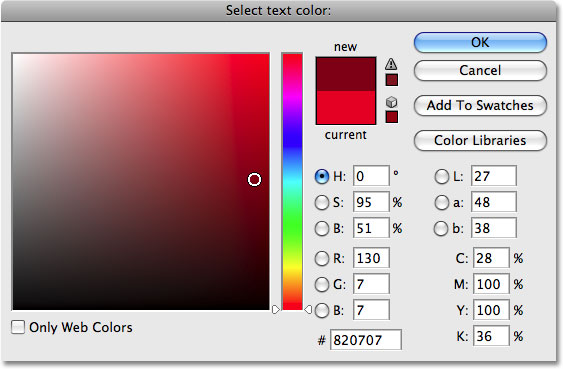
Choose a darker version of the original text color with the Color Picker.
When you're done. click OK to go out out of the Color Picker. It won't look similar much has happened in your document window just yet because the copied text layer is over top of the original text layer and hiding it from view, but nosotros're going to set up that in the side by side step.
Footstep 8: Select The Motion Tool
In order to create our shadow effect, nosotros need to move the original text slightly then we can see information technology beneath the copy of the text that's sitting above information technology. Permit's move the original text downwardly and to the correct. Non also much, but enough to create a shadow consequence. To motion the text, nosotros'll need Photoshop'due south Movement Tool, so select it from the top of the Tools palette or press the letter V on your keyboard to select information technology with the shortcut:

Select the Move Tool.
Step nine: Nudge The Original Text Layer Downwards And To The Right
We needed to select the Move Tool, but we don't actually demand to employ it to move our text. Y'all could click inside the document and drag the text down and to the right with your mouse, but in this case, an easier way might simply be to use the pointer keys on your keyboard to nudge the text. Printing the Downward arrow key a few times to nudge the original text downward, then click the Correct arrow central the same number of times to nudge it to the right. I'm going to press my Down pointer fundamental 10 times, then the Right pointer cardinal 10 times, to nudge my text and create my shadow result:

Use the arrow keys to nudge the original text down and to the correct to create the shadow effect.
Call up, you still need to select the Move Tool first fifty-fifty if you're going to employ the pointer keys to move an object.
If you want, you can create a second shadow simply by following the aforementioned steps. Indistinguishable the original text layer by pressing Ctrl+J (Win) / Control+J (Mac), then click on the original text layer in the Layers palette to reselect it. Switch back to the Type Tool (since the Motion tool is currently selected), click on the color swatch in the Options Bar and select an even darker shade of the color from the Colour Picker. Select the Move Tool, then use the arrow keys on the keyboard to nudge the text downwards and to the right.
Here'south my text after following the steps to add a second shadow effect:
The upshot later on adding a second, darker shadow.
Where to go next...
And there nosotros have information technology! Check out our Text Effects or Photo Effects sections for more Photoshop furnishings tutorials!
Other Stuff
© 2022 Photoshop Essentials.com.
For inspiration, non duplication.
Site blueprint by Steve Patterson.
Photoshop is a trademark of Adobe Systems Inc.

How To Add Shadow Text Effect In Word,
Source: https://www.photoshopessentials.com/photoshop-text/text-effects/text-as-shadow/
Posted by: kentunclefor.blogspot.com
0 Response to "How To Add Shadow Text Effect In Word"
Post a Comment